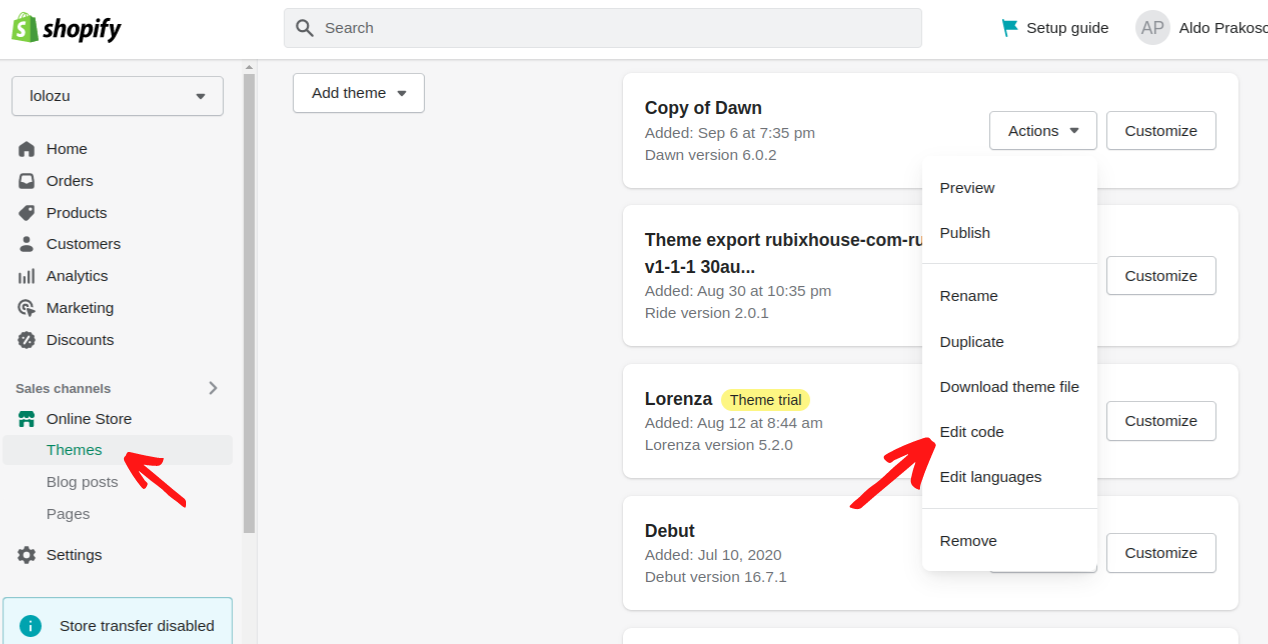
On this blog post I will give step by step how to add custom fonts on Dawn themes, it is not only limited to the Dawn themes but also works for most of the Shopify 2.0 themes. This tutorial doesn't need any coding skill, but familiarity with HTML or CSS would be great. Without further ado, let's get into the steps.
1. Making a backup copy of your theme
First step is to create a copy of your themes to make sure if there is unwanted thing happened along the process, you still have a backup for the original themes. You can do it by going to Online Stores > Themes. Click "Actions" button then click "Duplicate"

2. Download the custom fonts
There are 3 types of font format that works for most of the browser:
- OTF (Open Type Format)
- WOFF
- WOFF2
so for this tutorial we will just use 3 of themes, actually there are 6 font formats that available today but we don't really need it. You can see the table below for the all the available font formats.

(source: https://medium.com/@aitareydesign/understanding-of-font-formats-ttf-otf-woff-eot-svg-e55e00a1ef2)
There also some websites to download a free themes but make sure to check the lisence if you use it commercially:
If the themes just provide one type of format like .ttf or .otf you can convert that file to .woff and .woff2 using website called cloudconvert.com So make sure you have those 3 files otf, woff, and woff2
3. Adding the themes files
After you have those 3 files (otf, woff, and woff2), add those files by following these steps:
- Go to Settings > Files
- Upload the files
- The file link will be used in step 5

4. Open the code editor for your themes
You have uploaded all the 3 files, now is the time to implement in your themes code.
- Go to Online Store > Themes
- Click "Action" button from your the themes that you have duplicated in step 1
- Click "Edit Code"

5. Implementing new custom themes
Follow these steps to implement the new custom themes inside the code editor:
- Add new snippet and call it "my-custom-fonts"

- Insert following code to "my-custom-fonts.liquid"
- Change the variable below
- "customFontName": you change the font name whatever you want
- "woff2_url" : copy the woff2 link that you have uploaded in step 3
- "woff_url" : copy the woff link that you have uploaded in step 3
- "otf_url" : copy the otf link that you have uploaded in step 3
- See the example below

- Go to the Layout > theme.liquid
- Add the following code before the </head> tag
- See the example below

- That's it, you have successfully added your custom themes.
That's how you can add custom themes in Shopify Dawn themes and most of the Shopify 2.0 themes. Cheers!
If you have any questions, leave the comment below. I'm happy to help :)

2 comments
Thank you! This worked perfectly.
Thanks! it works in my themes